Last Updated: September 25, 2024
There are few feelings as sweet as watching someone dig into something you baked for them — whether that’s a birthday cake, a buttery croissant, or a fresh loaf of bread.
If you’re turning your hobby into a full-time career and starting a baking business from home, that feeling will become a regular occurrence!
This guide explains exactly how to start a baking business from home, from early-stage prep to protecting your earnings with insurance.
The 10 Steps to Start a Home Bakery
1. Research Legal Requirements
The first step to starting a baking business from home — and one you definitely don’t want to rush through — is educating yourself on the legal requirements for home-based food operations in your state.
All 50 states and the District of Columbia have cottage food laws in place that regulate the sale of food products made at home. These laws vary from one state to the next, but they can include things such as:
- Prohibiting the sale of perishable foods
- Caps on revenue
- Labeling requirements
As a result, some states have stricter laws than others. For instance, Wyoming is known for having more lenient cottage food laws, while Washington and Rhode Island have the most restrictions.
Cottage food laws in some states require you to prepare all homemade food in a commercial kitchen instead of your primary residence. (Meaning, you’ll have to rent a commissary to comply with the law.)
Check with your state’s department of agriculture or health to learn more about the rules you’ll have to follow.
2. Plan and Prepare Financially
While it won’t cost as much as opening up a brick-and-mortar business, starting a bakery business from home still involves dough (pun intended). So it’s important to understand how much it will cost so you can financially prepare to get your at-home bakery business up and running.
Your startup costs will differ depending on your location, what types of baked goods you want to sell, and the equipment you already own.
Initial Startup Costs
Calculating your startup costs is an important first step. These expenses can include:
- Licenses and permits (more on these later)
- Kitchen equipment and supplies
- Ingredients
- Decorating supplies
- Packaging materials and supplies, including labeling equipment
- Cleaning supplies
- Marketing and advertising (getting a logo, website, business cards, etc.)
- Insurance
- Utilities
- Accounting software
- Legal fees (if you hire legal counsel to help you develop contracts or establish your business structure)
- Shipping or delivery costs (if applicable)
- Rent for a commercial kitchen (if applicable)
Once you add these up, you’ll have a clearer picture of how much it will cost to start a bakery from home.
Profitability
In general, it takes about 18–24 months for a new business to break even and start turning a profit. At that point, you still may only be making $100 a month.
This might feel demoralizing, but keep in mind that it’s a normal part of starting your business.
Celebrate your victories as they happen, no matter how small, and focus on gradual improvements and a steady income stream. Profitable businesses aren’t created overnight!
The median income for home-based businesses in the U.S. is $51,816 per year. So even though you may not make a profit for the first year or two, you can reach a point where you’re in the black.
3. Name and Register Your Baking Business
One of the most enjoyable parts of starting a baking business from home is coming up with the perfect name for it!
Easy, right? Maybe, if you already have one in mind. But if you’re overwhelmed with options, start here:
- Consider your goals: Your name should reflect the core values and goals of your business and speak to your target customer.
- Do competitive research: Nothing is worse than coming up with a name you love, only to find out that another business has a similar (or even identical) name. Check out what your competitors are using so you know what to steer clear of.
- Use search-friendly words: Using a free keyword research tool like Ubersuggest, you can find phrases to incorporate into your business name that can help you show up higher in search results.
- Play around with a name generator: A tool like Domain Wheel’s Bakery Name Generator can help get your creative juices flowing. ChatGPT could be an even better option — you can feed it highly specific prompts to get more accurate business name ideas.
Once you’ve come up with some names you love, use the U.S. Patent and Trademark Office’s search system to see if any other businesses have trademarked them.
This is super important to do, as you could face charges of willful infringement if you try to do business under a name someone else owns the trademark for.
Once you’ve settled on your favorite name, make things official by registering it. The United States Small Business Administration (SBA) has a step-by-step guide to registering your business name, but you should also visit your state’s Secretary of State website for specific information about how to register a business where you live.
Check out our list of 43 cake business name ideas for a little inspiration!

4. Get Licenses, Permits, and Inspections
Beyond cottage food laws, other requirements for home-based bakers include obtaining certain licenses and permits, as well as passing inspections.
The licenses, permits, and inspections you’ll need will depend on which state you do business in, but most home-based bakers will need these:
- Cottage food license: See if your state requires you to carry a license to sell baked goods from home. Costs will vary but can be as high as a few hundred dollars.
- Business license: Check with your city or county officials to license your business.
- Home occupation permit: Local zoning laws will likely require you to obtain this permit to legally run a business from home. Cities and counties use this to make sure that your business won’t significantly impact traffic or noise in an otherwise residential area.
- Food handler’s permit: Requires you to take and pass a state-approved course on food safety.
- Sales tax permit: If you need to collect sales tax from the products you sell, you’ll need this permit.
- Federal Employer Identification Number: Required to file business taxes with the Internal Revenue Service (IRS) if you set your business up as a limited liability corporation (LLC) or some other type of corporation. Alternatively, if you opt for a Sole Proprietor business structure, you can use your social security number.
States with stricter cottage food laws may also have certain regulations about how big your kitchen needs to be, how many sinks you have, what type of equipment you use, and more.
Many states require your kitchen to pass a health department inspection to ensure it meets health and safety standards. Most health inspections evaluate criteria like:
- How your foods and ingredients are being stored (whether they’re clearly labeled, stored at safe temperatures, and avoiding cross-contamination)
- Whether your surfaces and equipment are properly cleaned and sanitized
- Whether you (and your employees, if you have any) follow proper hygiene protocols
- Whether there are signs of pests in your kitchen
Take the stress out of prepping for a health inspection with our free food inspection checklist.

5. Stock Up on Equipment and Supplies
While you probably have a decent amount of baking supplies at home already, you’ll need more to be able to produce larger quantities of goods than you ever needed as a hobbyist baker.
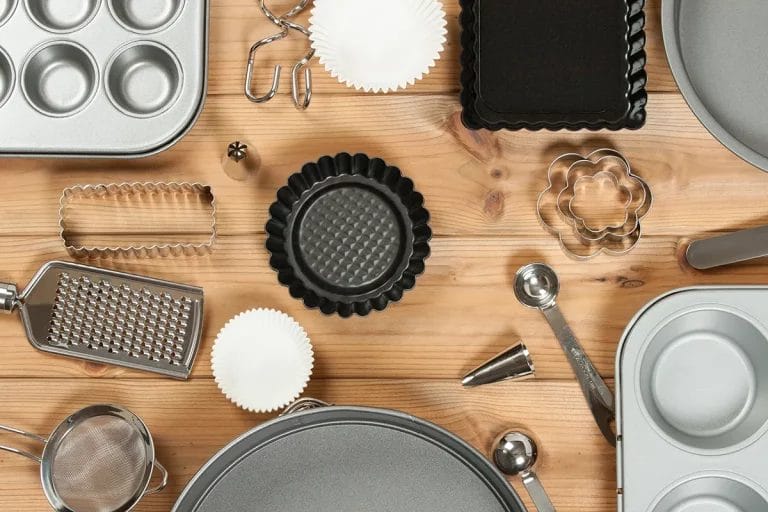
The exact list of gear you’ll need can vary depending on what you intend to sell, but here’s an idea of what you might expect to buy.
Baking Equipment
- Oven (possibly commercial-grade, depending on your volumes)
- Stand mixers
- Baking sheets and pans
- Cooling racks
- Rolling pins
- Measuring tools
- Mixing bowls
- Pastry bags and tips
- Spatulas and whisks
- Sifters and sieves
- Timers
- Thermometers
- Bread proofing baskets
Sanitation and Safety
- Handwashing station
- Aprons
- Hairnets
- Food-grade gloves
- Cleaning agents and disinfectants
Storage and Organization
- Refrigerator
- Freezer
- Shelving and racks
- Airtight containers for storing ingredients
Packaging and Delivery Supplies
- Insulated bags or containers
- Labels and stickers
- Boxes and takeout bags
Ingredients and Supplies
- Basic baking ingredients (such as eggs, flour, sugar, butter, and yeast)
- Specialty baking ingredients (like gluten-free flour or egg replacer)
- Decorating supplies (might include food coloring, sprinkles, and fondant)
6. Practice and Set Your Menu
One of the best parts about starting your own at-home bakery business is getting to choose what you want (and don’t want!) to bake.
Add items to your menu that fit the following criteria:
- You feel confident in your ability to bake them at a professional level
- You can afford the time and materials needed while still maintaining the profit margins you want
- You have the space to make them (either at home or in a commissary kitchen)
- There is a demand for those goods in your area
- You can make them at scale as your business grows
- You love making them!
You don’t have to be crazy about everything you make, but you should feel proud of what you produce. That pride in your work will come through to customers in the time and care you put into each of your creations.
Craft a Sample Menu
When you start to plan your menu, begin by deciding on some core offerings that you’d like to bake year-round that showcase your primary strengths as a bakery.
Offer a wide variety of flavors, sizes (e.g. slices of cake versus whole cakes), and options for those with dietary restrictions, such as vegan or nut-free items.

Test and Refine Your Menu
It’s one thing to make the perfect peach tart once. It’s a whole other thing to make two, three, or more perfect peach tarts that all taste and look like the first. Bake each menu item multiple times and practice being consistent with taste, texture, and appearance as much as possible.
Next, get feedback from friends and loved ones (they’re going to love this part). Ask them to give you their honest opinions and tweak your recipes based on what they say.
You can also ask them to “order” from you and practice fulfilling their order. Collect feedback from them on the ordering process, such as how easy it was and if they felt their order was fulfilled in a reasonable amount of time.
Finalize Your Menu
Narrow down all of your options based on your experience practicing each recipe and the feedback you’ve received. You should feel confident that everything on your menu will be well-received.
It may be tempting to have an extensive menu, but when you’re first starting out, it’s better to keep your menu short, sweet, and easy to manage. You can always add more to it later!

7. Price Your Baked Goods
It may be tempting to look at what your competitors are charging for similar items and match — or undercut — their prices. It’s good to know what your competitors’ prices are, but there’s more that goes into pricing your products.
The first thing you need to do to determine pricing is understand the cost of your inputs.
The Cost of Ingredients
Create a list that includes each ingredient you purchase for your business and how much you pay for it. Based on this list, you can calculate exactly how much it costs you to purchase ingredients for each menu item.
For example, if you buy 12 eggs for $5 a carton and your lemon cake recipe requires 2 eggs, start by dividing $5 by 12 to get the cost of one egg (about $0.42). Multiply that number by 2 and you’ll find it costs you $0.84 in eggs to make your lemon cake. Repeat this process with all the other ingredients you use in this cake.
The Cost of Labor
To calculate your labor costs, you need to determine what your time is worth. If you worked in a local bakery, how much would you make per hour? For the sake of example, let’s say you’d be paid $20.
If it takes you 3 hours total from start to finish to make a lemon cake, you know that the labor cost for this item is $60.

Your Overhead Costs
Overheads include things like fixed costs (insurance, the amount you pay per year to the web host for your site, etc.) as well as variable expenses. These could include the amount of muffin tins you had to buy after getting a huge order one month when you barely sold any the month before.
With variable costs, you can’t predict the exact amount you spend on overheads each month, but give it your best estimate.
Let’s say your overheads come out to $150 a month. Divide this number by the amount of items you plan to sell each month. Be conservative as to the number of items you estimate you can sell monthly.
So, if you expect to sell 400 units, divide $250 by 400 to get the overhead cost per item: $0.38.
Your Cost of Goods Sold
Once you’ve figured out the cost of ingredients, labor, and overhead for each item on your menu, you can calculate your cost of goods sold (or COGS).
Simply add them up like so:
Cost of Ingredients + Labor Costs + Overhead Costs = Your Cost to Make the Item
Your Desired Markup
Next, take the cost it takes you to make each item and use a markup method to set the retail prices for each of them. Not sure where to start? Check out these four pricing strategies food businesses use to maximize profits!

8. Invest in a Good Website
A functional, attractive website is critical for any business, but it’s especially important for home-based businesses. While brick-and-mortar bakeries will have a physical storefront, you’ll only have a virtual one, so make it count!
Here are the features your website needs:
- User-friendly design: Your site should look professional and consistently match your branding (logos, colors, fonts, etc.). It should be responsive and load quickly while being easy to navigate.
- Online ordering system: Your site should have a form that allows customers to order online and a secure payment processing system.
- About page: Share the story of how you came to start your home baking business!
- Menu: List items and prices with high-quality pictures of your creations.
- Contact page: Include your phone number and email address as well as your social media handles.
- Customer testimonials: Display positive reviews from customers on your site to build credibility and trust.
- Search engine optimization (SEO): Use keywords related to your business throughout your site to show up higher in search results when people look for bakers in your area. Use free resources like Ubersuggest’s Free Keyword Research Tool to find relevant keywords for your business.
While you may feel like you need to hire a professional web developer to build your site — especially if you aren’t super tech savvy — that’s not necessarily the case! You can make your own site using Wix’s AI website builder or get a Square website with built-in online ordering.

Angel Cakes Vintage Bakery has consistent branding throughout its site, with its logo front and center and nostalgic, retro fonts. Their clear, easy-to-navigate menu includes everything from an About page to their menu to how you can sign up for their email newsletter.
9. Start Your Marketing Strategy (and Commit to It!)
If a home-based bakery opens up and nobody knows about it, did it ever really open at all?
Don’t let your business operate in silence! Investing time and money into a marketing strategy will pay off once you get your name out in front of potential customers and start making sales.
It will take time to learn what marketing tactics work and what doesn’t, so don’t give up if you aren’t seeing results automatically. Give these home bakery ideas your best shot and pivot as needed.
Social Media
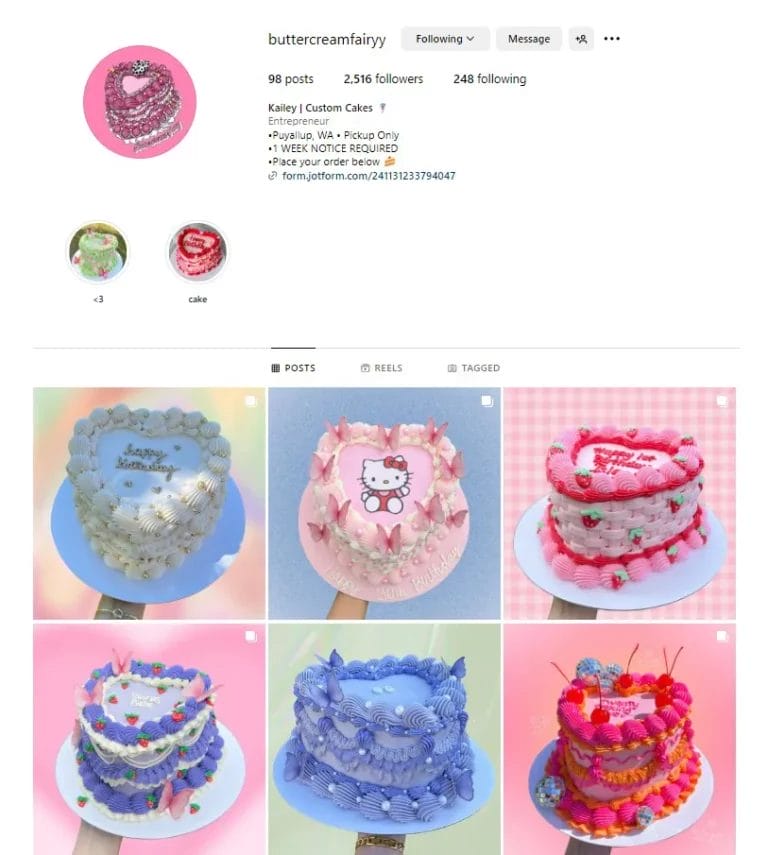
Creating social media business profiles is a great way to build awareness of your brand, connect with existing customers, and attract new ones.
The best platforms for home-based baking businesses rely heavily on images and/or videos, making them the perfect place to show off your baking business repertoire.
They also offer paid advertising opportunities and the ability to turn your posts into ads, which can help you reach a wider audience.
The best social media for home bakers are:
Out of these options, Facebook and Instagram have the biggest user bases and are tied as the top platforms for the highest marketing return on investment (ROI).
Learn more about how to promote your business on Instagram, from setting up your profile to creating shareable content that will get people excited about your business!
Word-of-Mouth
64% of marketers agree word-of-mouth is the best type of marketing because it leads to 90% of all purchases.
How do you get people to talk about your business?
- Encourage satisfied customers to leave online reviews about your business on Google or Yelp. After all, 95% of customers say they read online reviews before they purchase something.
- Create a referral program and reward customers with a discount or freebie after they successfully refer someone else to your business.
- Stellar customer service leaves a lasting impression and makes customers more likely to speak highly of you with friends and loved ones.
Physical Media
In our hyper-digital age, using physical materials for marketing can feel outdated. But the truth is, they can still be super effective as part of your overall marketing strategy!
Your print media marketing materials can include things like:
- Business cards: Use a service like VistaPrint to make your own business cards, including your logo, contact information, and social handles.
- Stickers: Stickers can be relatively inexpensive to produce via sites like StickerYou. Sell them as swag or include them as freebies with orders, and encourage customers to share pictures on social media of where they put their sticker.
- Flyers: Use Canva to make branded flyers for your business and ask local businesses if you can post them on their community bulletin boards. Make sure to include tearaway contact information at the bottom!
10. Protect Your Home Baking Business With Insurance
You wouldn’t send your customer home with a dozen cupcakes without a sturdy box to carry them in.
Well, the same is true for starting a home baking business without insurance. Insurance is like the box safely carrying those cupcakes — it protects you from the financial impact of the risks you face.
These risks include things like:
- A customer having an allergic reaction to an unlabelled allergen in your banana bread and suing you to cover their medical bills
- Accidentally denting the stainless steel freezer in the commercial kitchen you rent and the landlord asking you to pay for repairs
- One of your customers tripping while coming up the stairs of your home to pick up an order and needing to go to the ER for stitches
One FLIP policyholder was hit with a $15,000 claim after a customer suffered a reaction from an unlabeled allergen in their protein bites. This easily could’ve been a financially devastating scenario, but because they had insurance, the claim was covered and they saved thousands in out-of-pocket expenses.
With home bakery insurance from FLIP, you can receive coverage for incidents like these and not worry about an honest mistake jeopardizing the business you worked so hard to build — all for as low as $25.92 a month!
Get your free home bakery insurance quote to make sure your business is protected!
Ready to learn more? Check out our top tips for running a successful bakery and learn how to take your business to the next level!
FAQs About How to Start an At-Home Bakery
Yes, you can! To set up your online storefront, follow these steps:
- Check local laws: Make sure your state allows you to sell homemade food online and what the restrictions are.
- Pick a platform: Wix and Square are favorites for online sellers because they have templates and tools that make it easy to launch online stores.
- Set up online ordering: List your products with high-quality images, descriptions (including ingredients/common allergens) and integrate secure payment methods like PayPal or Apple Pay.
- Decide on shipping and delivery options: Choose between local delivery, pickup, or a combination of the two. Invest in protective packages and determine your shipping rates and which carriers you’ll work with.
If you want to ship or deliver your baked goods, here’s what you need to do:
- Establish your delivery and shipping area: You may want to limit your delivery to local customers, so determine what that radius is. The same is true if you want to ship — ask yourself how far you’re willing to ship your products.
- Choose which products you’ll ship: Some goods will hold up better than others when being shipped, such as cookies and brownies.
- Decide how you’ll package your goods: Invest in sturdy packaging with airtight seals to maintain freshness, as well as insulated packaging for temperature-sensitive goods.
- Pick the perfect shipping method: Choose fast shipping options to ensure your baked goods stay fresh by the time they reach your customer. Choose between a flat shipping rate or if it will differ depending on distance, weight, and speed.
You can maintain consistent quality across your baked goods by doing the following:
- Standardizing your recipes with precise measurements, baking times, and temperatures
- Source ingredients from reliable suppliers and avoid switching between them unless you have to
- Control your baking environment as much as possible, being mindful of the temperature and keeping workspaces clean and uncluttered
- Conduct regular quality control checks for taste and appearance
- Produce only what you can reasonably manage without sacrificing quality

Updated By Alex Hastings
Alex is a Marketing Copywriter at Food Liability Insurance Program (FLIP). In her free time, she enjoys reading, birding, traveling, and finding any excuse to get brunch.

Reviewed by: Kyle Jude
Kyle Jude is the Program Manager for Food Liability Insurance Program (FLIP). As a dedicated program manager with 10+ years of experience in the insurance industry, Kyle offers insight into different coverages for food and beverage business professionals who are looking to navigate business liability insurance.
